
Well, this is what I did...
![Image]()
![Image]()
![Image]()
![Image]()
![Image]()
![Image]()
![Image]()
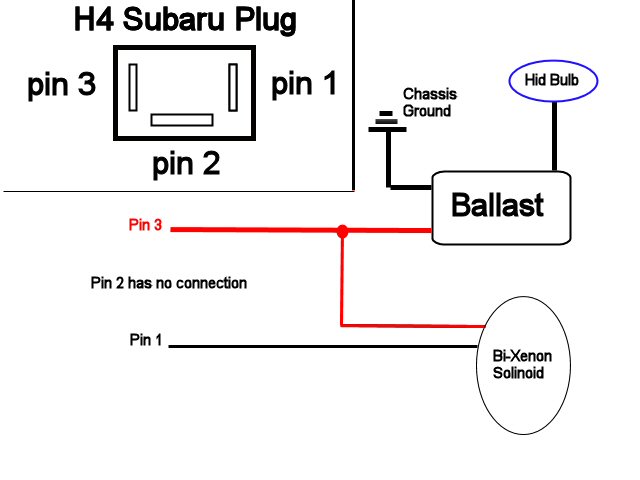
I retrofitted my stock 05 headlights to hold FX35 bi-xenon projectors. The parts I used include Phillips 85122+ bulbs, Hella gen 3 ballasts, and BMW E46 shrouds.
Before I sawed up my headlights I made a prototype thanks to the smashed up headlight that "zee lee" donated to me. Here are the remains zl.
![Image]()
I'll post more info and some procedure if folks are interested.
craigr


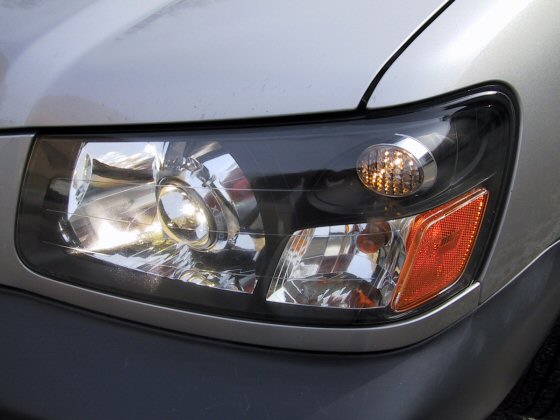


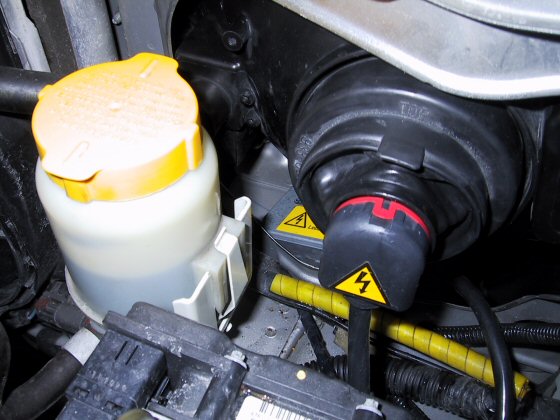
I retrofitted my stock 05 headlights to hold FX35 bi-xenon projectors. The parts I used include Phillips 85122+ bulbs, Hella gen 3 ballasts, and BMW E46 shrouds.
Before I sawed up my headlights I made a prototype thanks to the smashed up headlight that "zee lee" donated to me. Here are the remains zl.

I'll post more info and some procedure if folks are interested.
craigr
")