

After much waiting I've installed my Homelink mirror. We have a double garage so there's no better reason to get one. No need to keep two remotes stuck on the sunvisor anymore, yay ! Level of difficulty, 3 out of 10. The only two tools you really need are a phillips and slotted screwdriver.
First off the instructions aren't all that great. Sure once you've done it they all make sense but the pictures are cartoon and not the most accurate so at times you're left guessing. Well you're in luck since I took pics every step of the way.
The homelink mirror is different from the OEM and the Compass mirror. It requires a camlock adapter to fasten to the windsheild mount, why I don't know. My Forester came with the Compass mirror. I sold mine for the upgrade, then couldn't find a Homelink so I ran the OEM mirror which by the way fits on the same OEM mount as the Compass.
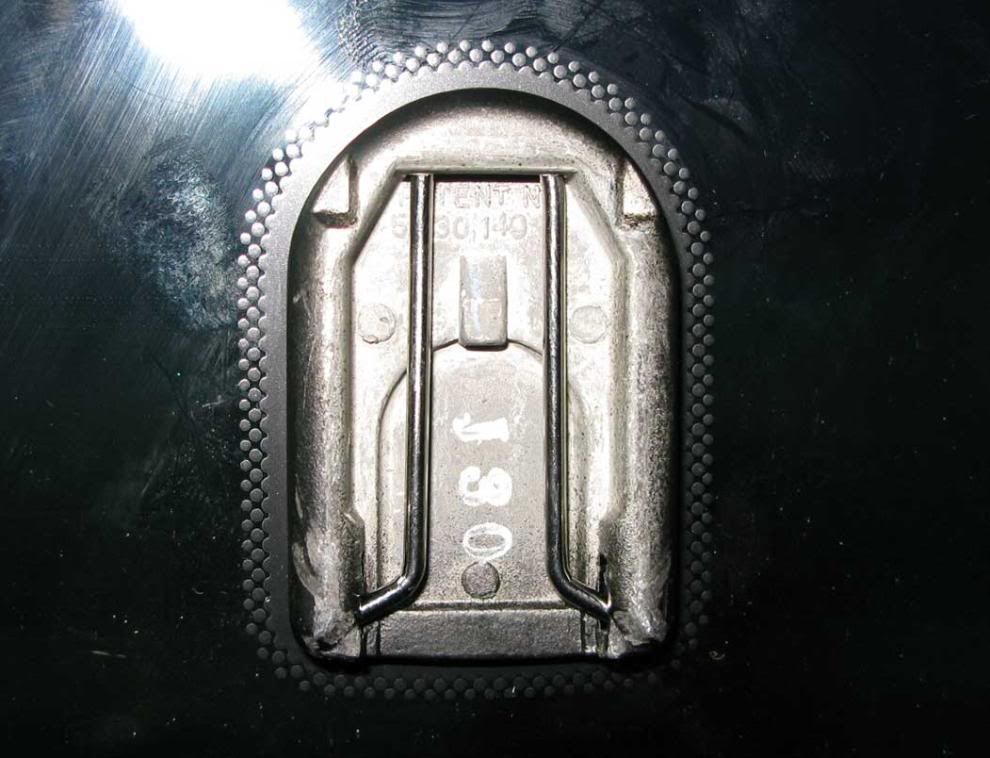
Before starting the install in the car here's something to do in the house. Note: the instructions make NO mention that you have two different sized screws and where they go. It just says "put them in", thanks.
![Image]()
Here's where they go, actually all that matters is you put the one longer screw in the top. And that's somethign else, the instructions are too cartoon to tell which way to face the camlock. In fact the picture looks nothing like it in real life. Again thanks.
![Image]()
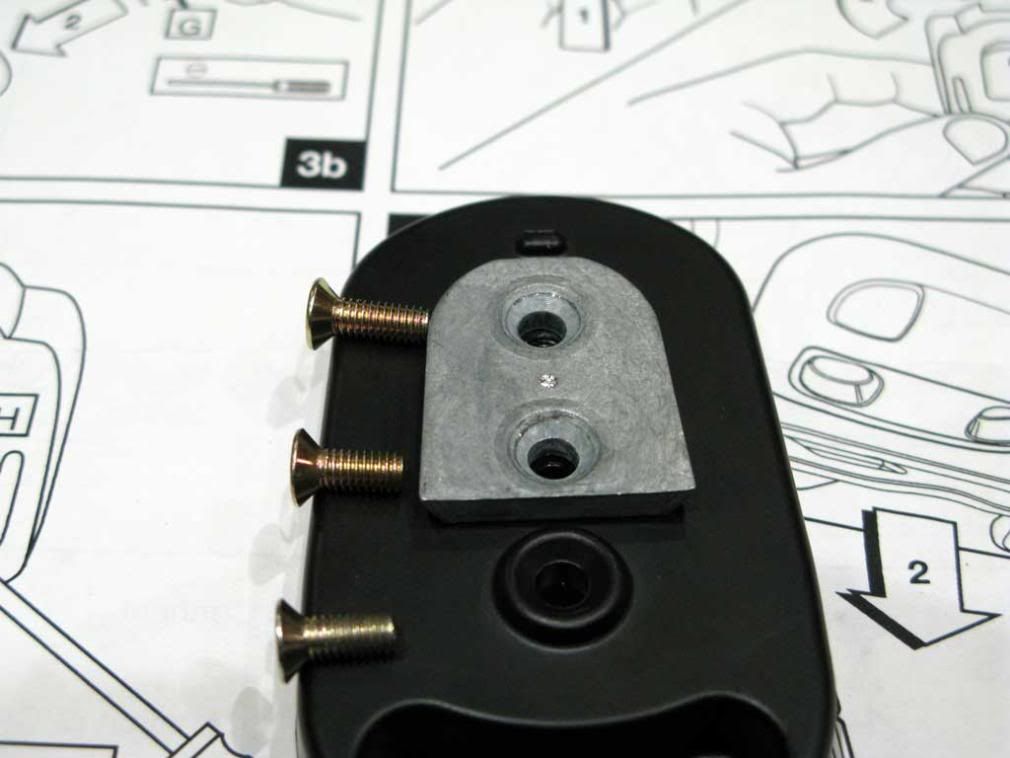
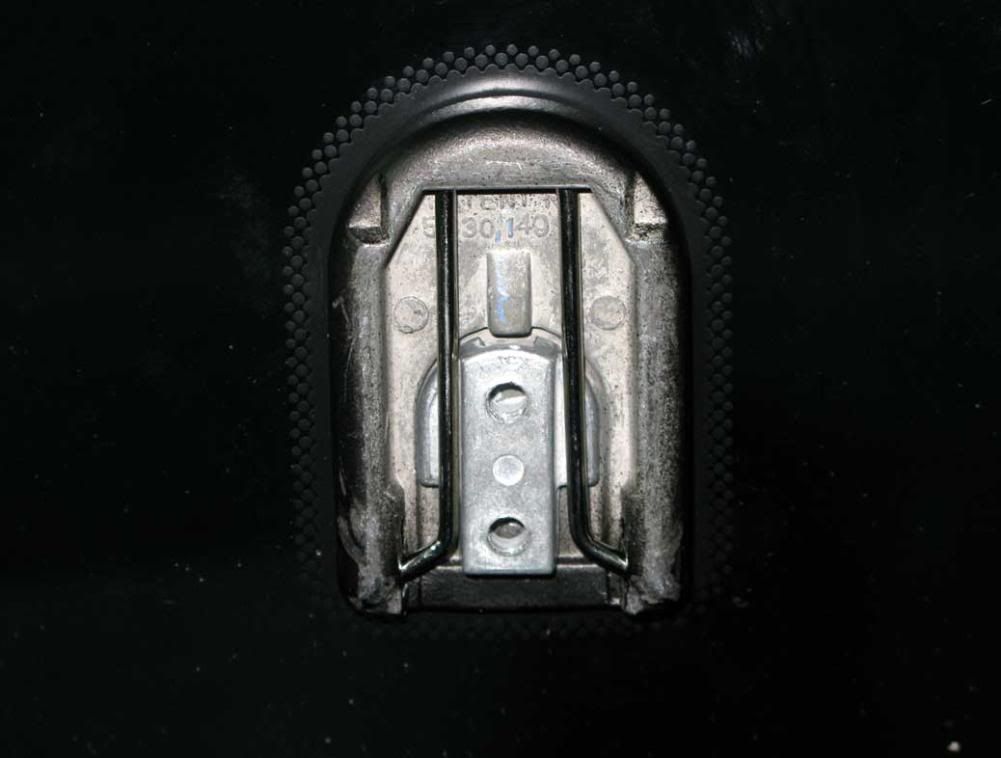
Fasten the cast iron piece to the camlock. It goes in with the bevelled side facing upwards, don't miss that or the screws will stick out further. Fasten the top screw all the way down, this just holds the cast piece to the camlock. The other two pieces will be installed in the car.
![Image]()
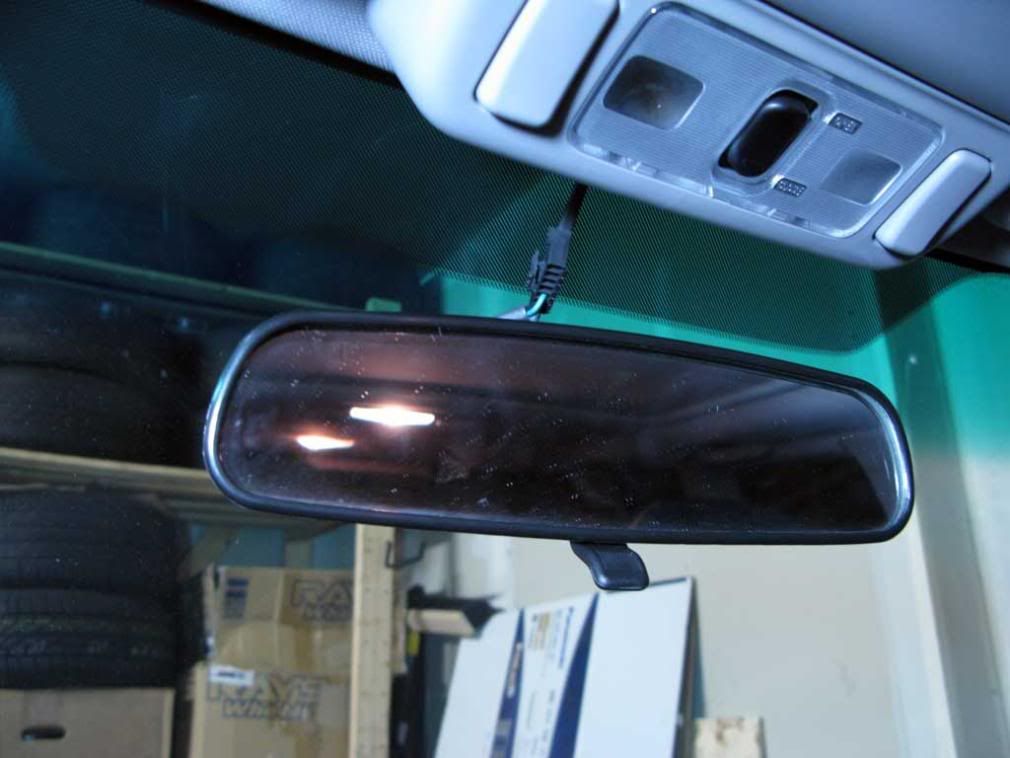
Here is the lamo OEM mirror. Time to put it out of its misery
![Image]()
Its removed by twisting the base 90 degrees. Don't tug on the mirror or you risk cracking the glass. Put your hand on the base and twist.
![Image]()
Like this. Then just slide it down and you're done.
![Image]()
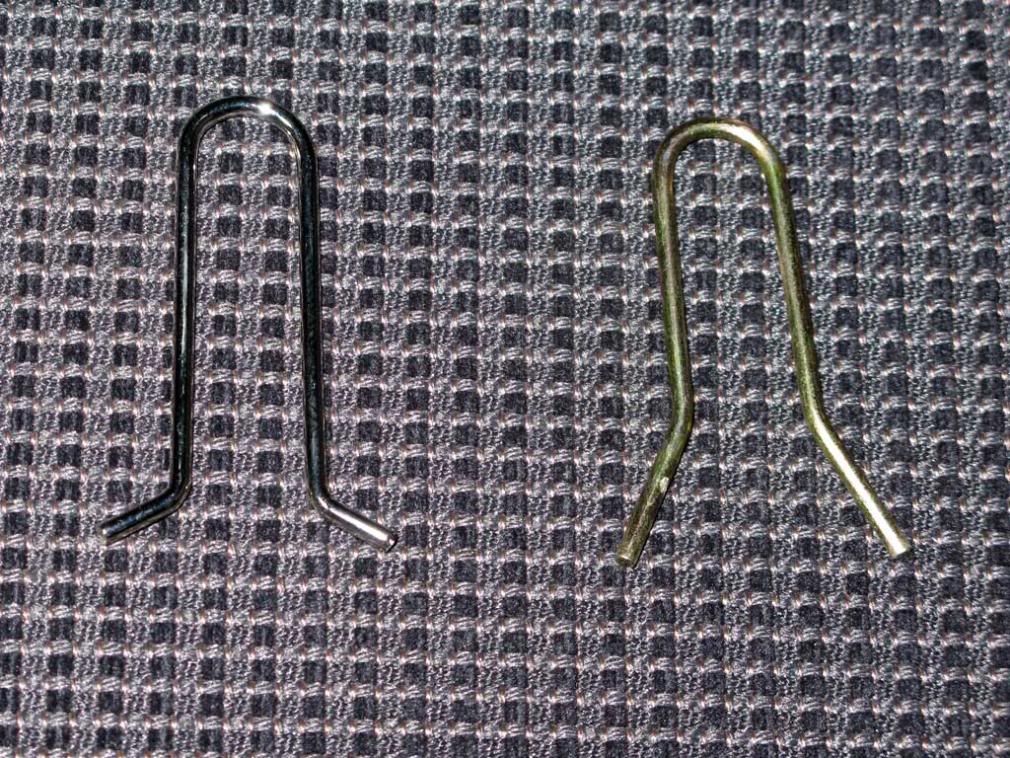
Replace the clip with the one supplied with the kit. You may think "why bother", well as I found out they are different enough that the mount will not sit properly with the OEM clip. Check it out, Homelink clip on the left, OEM on the right. Just different enough to make life miserable if you don't do this step. It recommends a screwdriver to remove the clip but you don't need one, I just stuck my nail in there and pulled it out a side at a time.
![Image]()
OEM
![Image]()
New
![Image]()
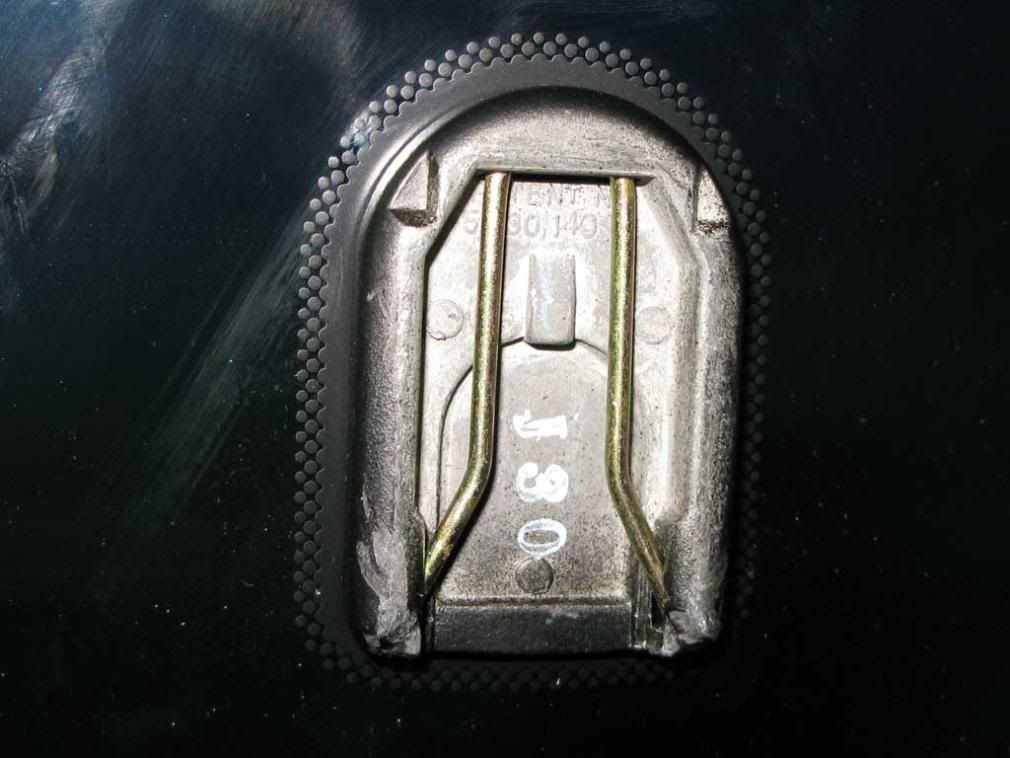
Then put the other cast iron bit in the clip and push it up all the way. Make sure its facing the right way
![Image]()
Now its time to fasten the camlock to the OEM mount. The two bottom screws will hold it in place. Screw them into the cast iron bit . Don't overtighten, cast iron will strip very easily. Just tight is good enough, this isnt' an airlock in the space shuttle.
DEC 2010 EDIT: After nearly 3 years I found the mirror had some play in it. The source of the problem was the two top screws had loosened over time. It might be a good idea to apply some locktite at this point to avoid this issue. See my Dec 11 2010 post for full details.
![Image]()
Now to run the wiring to power the Homelink. The entire top console has to come off. Start with removing the cover for the lights. Just put a straight edge screwdriver or knife in the bottom (there's a slot) and gently pry out from the bottom then the top.
![Image]()
This reveals the light assembly. Remove the two phillips screws on each side.
![Image]()
Open the top sunglass holder and remove the phillips screw
![Image]()
Now you can pull out the console. I chose to let it hang by the wiring. Its not exactly heavy so you should be safe.
![Image]()
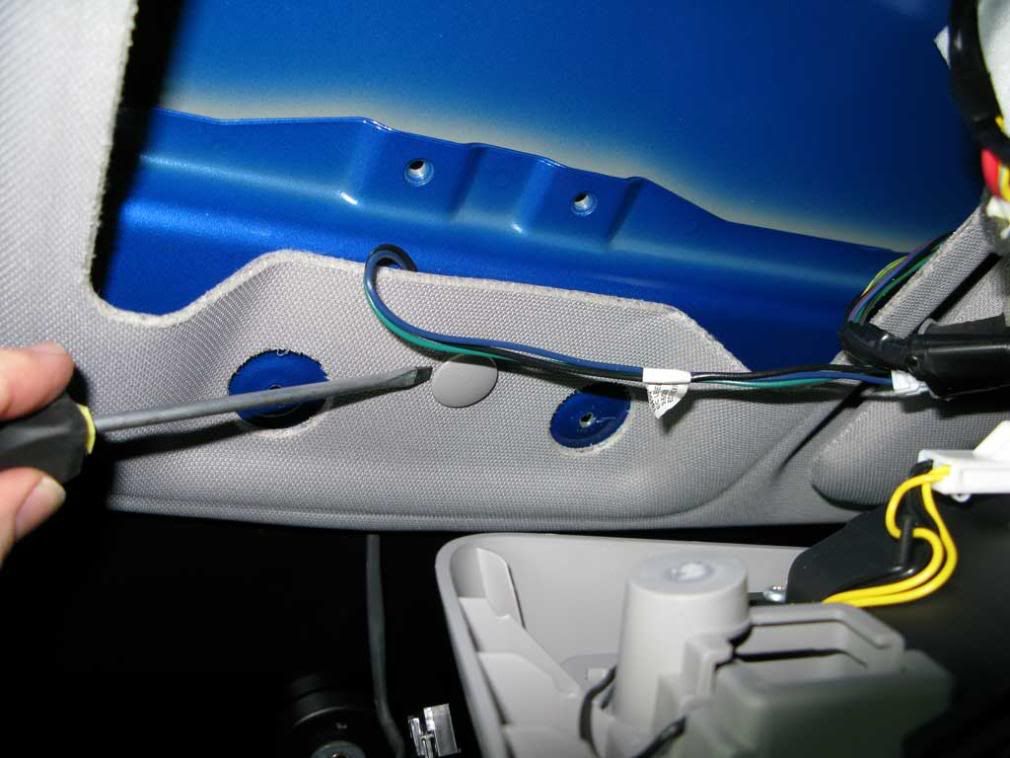
Remove the plastic screw that holds the trim in place. This way you can pull it back to slide in the new wiring harness. You can see my old one is in the way with the green/blue wires.
![Image]()
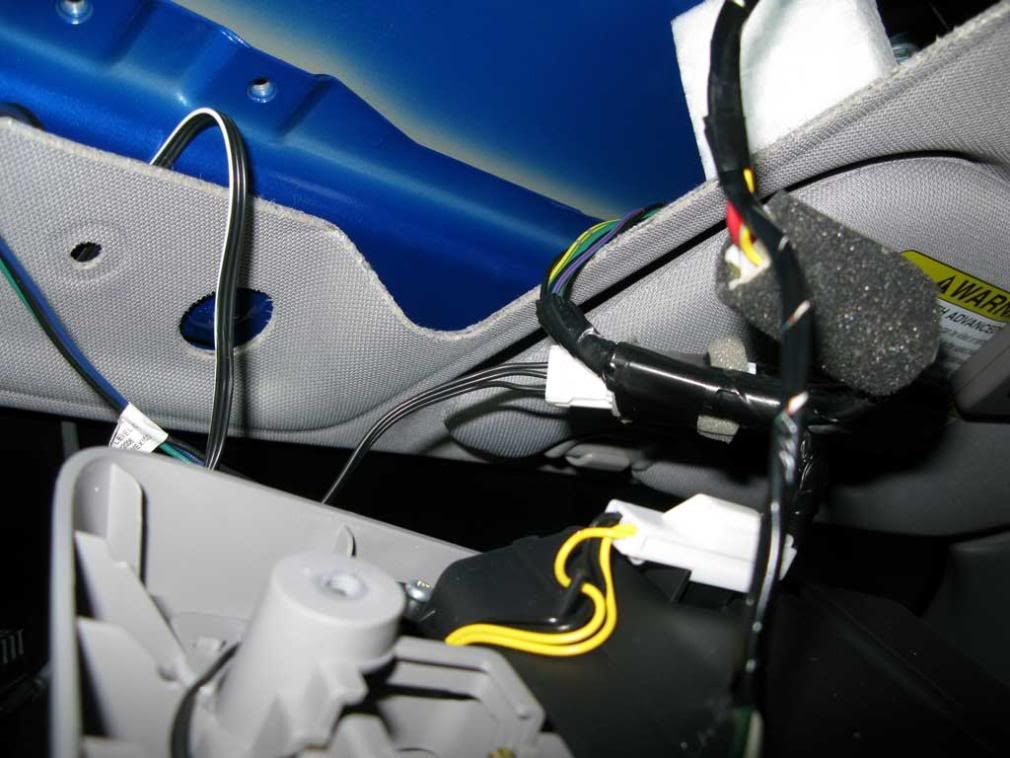
Unplug the wire harness
![Image]()
From this end
![Image]()
And run the new harness though the headliner. Don't forget to plug it in at the top before you put the console back together. The console goes back to gether in reverse order. Piece of cake.
![Image]()
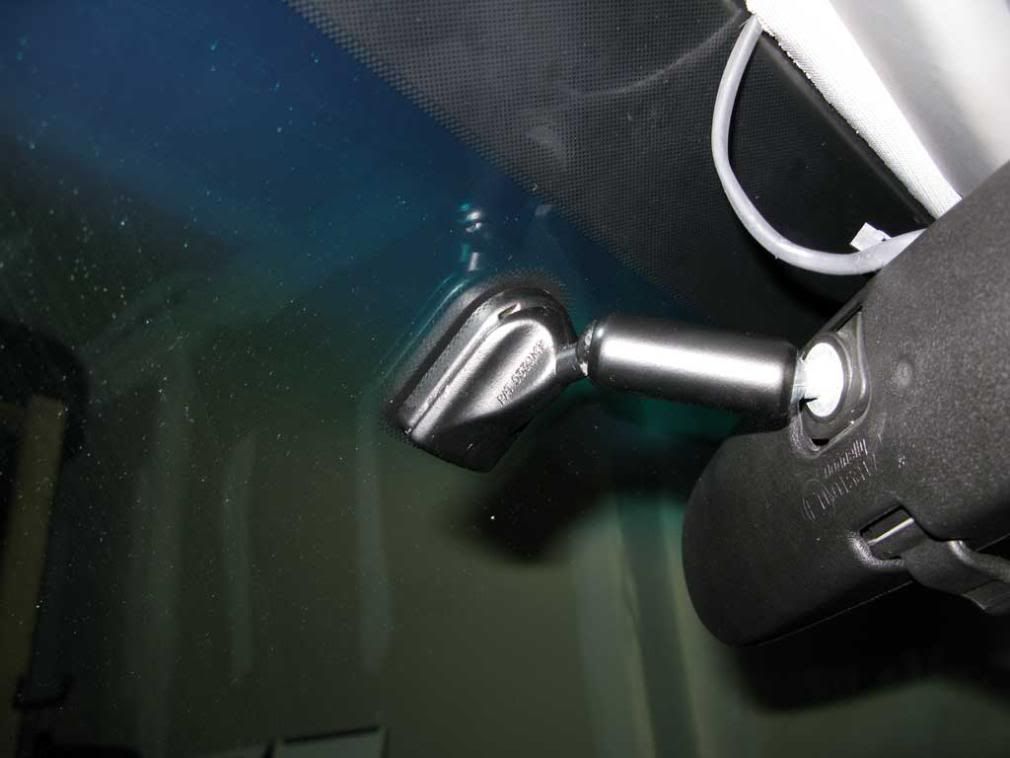
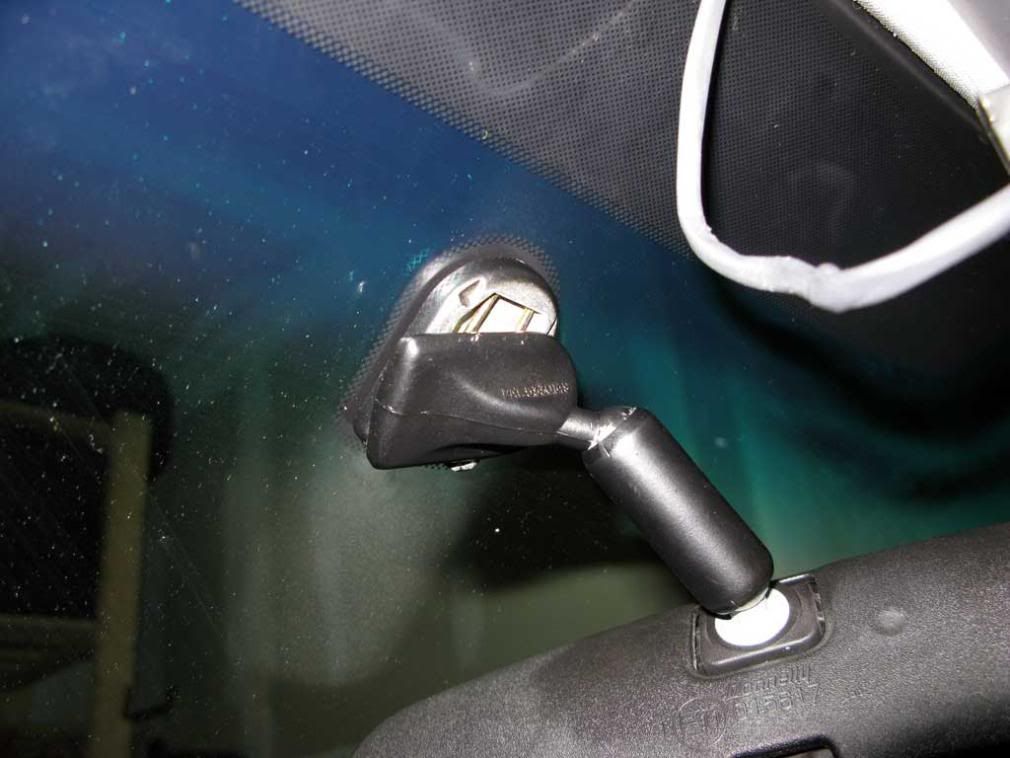
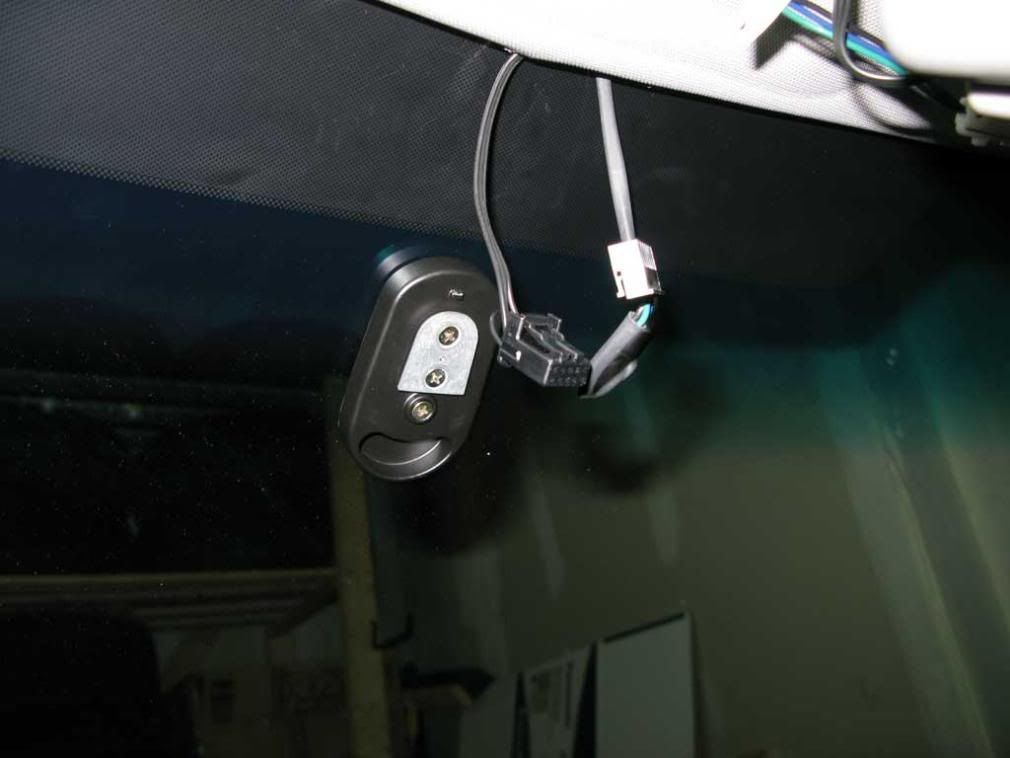
Time to fit the mirror in place. Just slide it in from the top down. It won't stay by itself without tightening it so hold it with one hand.
![Image]()
First off the instructions aren't all that great. Sure once you've done it they all make sense but the pictures are cartoon and not the most accurate so at times you're left guessing. Well you're in luck since I took pics every step of the way.
The homelink mirror is different from the OEM and the Compass mirror. It requires a camlock adapter to fasten to the windsheild mount, why I don't know. My Forester came with the Compass mirror. I sold mine for the upgrade, then couldn't find a Homelink so I ran the OEM mirror which by the way fits on the same OEM mount as the Compass.
Before starting the install in the car here's something to do in the house. Note: the instructions make NO mention that you have two different sized screws and where they go. It just says "put them in", thanks.
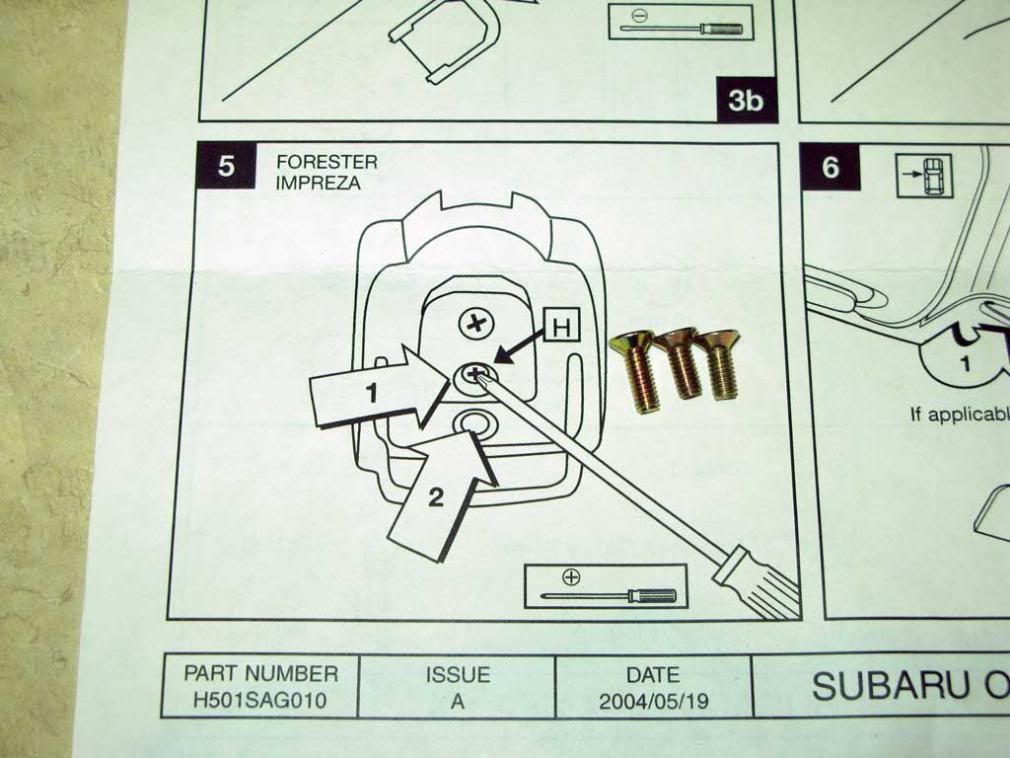
Here's where they go, actually all that matters is you put the one longer screw in the top. And that's somethign else, the instructions are too cartoon to tell which way to face the camlock. In fact the picture looks nothing like it in real life. Again thanks.
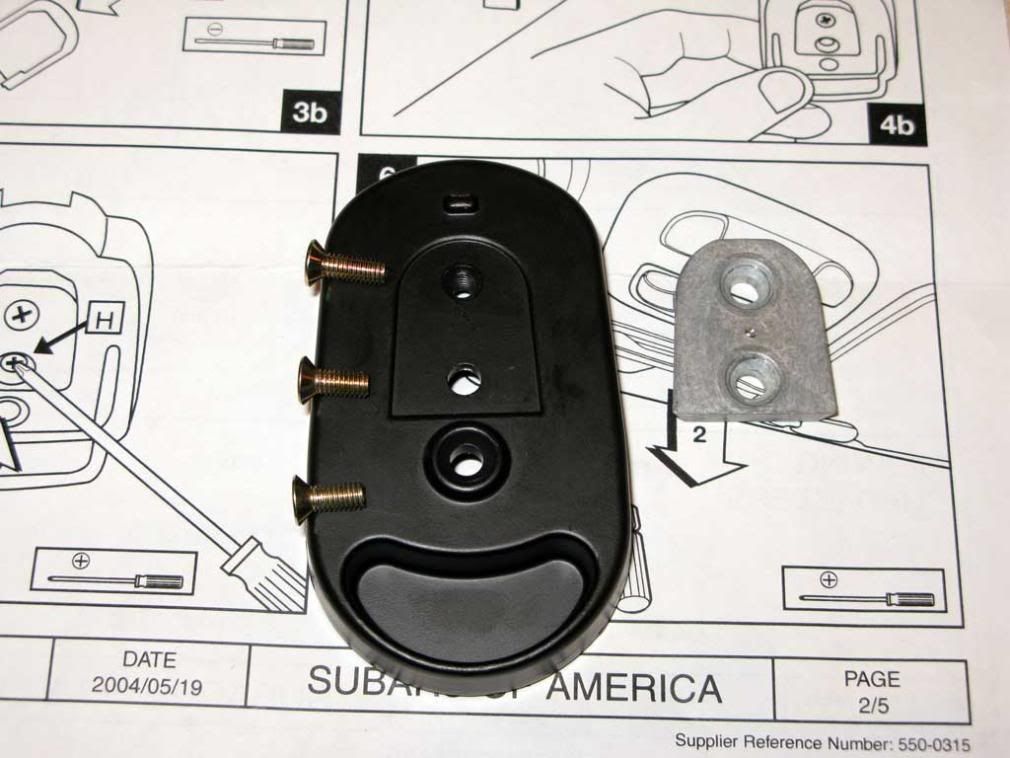
Fasten the cast iron piece to the camlock. It goes in with the bevelled side facing upwards, don't miss that or the screws will stick out further. Fasten the top screw all the way down, this just holds the cast piece to the camlock. The other two pieces will be installed in the car.
Here is the lamo OEM mirror. Time to put it out of its misery
Its removed by twisting the base 90 degrees. Don't tug on the mirror or you risk cracking the glass. Put your hand on the base and twist.
Like this. Then just slide it down and you're done.
Replace the clip with the one supplied with the kit. You may think "why bother", well as I found out they are different enough that the mount will not sit properly with the OEM clip. Check it out, Homelink clip on the left, OEM on the right. Just different enough to make life miserable if you don't do this step. It recommends a screwdriver to remove the clip but you don't need one, I just stuck my nail in there and pulled it out a side at a time.
OEM
New
Then put the other cast iron bit in the clip and push it up all the way. Make sure its facing the right way
Now its time to fasten the camlock to the OEM mount. The two bottom screws will hold it in place. Screw them into the cast iron bit . Don't overtighten, cast iron will strip very easily. Just tight is good enough, this isnt' an airlock in the space shuttle.
DEC 2010 EDIT: After nearly 3 years I found the mirror had some play in it. The source of the problem was the two top screws had loosened over time. It might be a good idea to apply some locktite at this point to avoid this issue. See my Dec 11 2010 post for full details.
Now to run the wiring to power the Homelink. The entire top console has to come off. Start with removing the cover for the lights. Just put a straight edge screwdriver or knife in the bottom (there's a slot) and gently pry out from the bottom then the top.

This reveals the light assembly. Remove the two phillips screws on each side.

Open the top sunglass holder and remove the phillips screw

Now you can pull out the console. I chose to let it hang by the wiring. Its not exactly heavy so you should be safe.
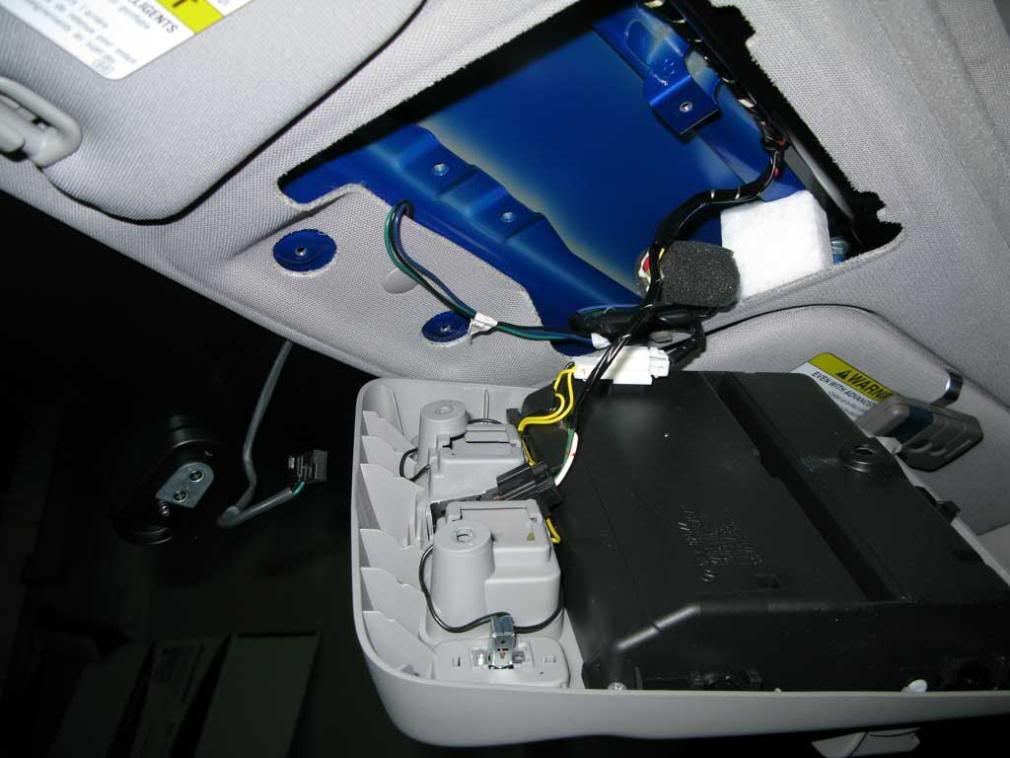
Remove the plastic screw that holds the trim in place. This way you can pull it back to slide in the new wiring harness. You can see my old one is in the way with the green/blue wires.
Unplug the wire harness
From this end

And run the new harness though the headliner. Don't forget to plug it in at the top before you put the console back together. The console goes back to gether in reverse order. Piece of cake.
Time to fit the mirror in place. Just slide it in from the top down. It won't stay by itself without tightening it so hold it with one hand.


")


