
Hi all:
I just wanted to let you all know about a mod I did to my new Forester after putting around 4k kms onto it in about 2 months.
I found the driver's seat didn't have enough thigh support, and felt like I was sitting "on" the seat vs "in" the seat (as another poster once described it).
Turning corners felt like I was sliding around too much, and I was getting serious leg fatigue from driving, no matter what combinations I tried. My right leg, especially, was fighting to stay vertical to use the pedals.
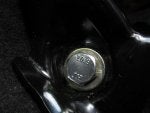
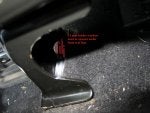
Long story shorter... after seeing how others had done this mod in their cars (Prius seemed to be a popular one), I removed the two front bolts of the driver's seat, installed 3 thick washers, re-drilled holes into the legs in newly-required positions, (lower on the seat's legs) and re-installed new, longer bolts (M10 x 1.25mm pitch x 40mm long) of a superior rating/grade. I put an additional washer under the new bolt-head, et voila.
The result is that I now feel more secure in the seat, the electric thigh support finally is able to come up high enough to support the thighs, and I'm pushed further back into the seat (increased side-bolster support as a result) The entire seat now sits at more of an incline (if only a few degrees) and finally feels more like a bucket versus a bench.
This, for me, is a tiny mod with a tremendous result. I'm actually enjoying the Forester again")
I just wanted to let you all know about a mod I did to my new Forester after putting around 4k kms onto it in about 2 months.
I found the driver's seat didn't have enough thigh support, and felt like I was sitting "on" the seat vs "in" the seat (as another poster once described it).
Turning corners felt like I was sliding around too much, and I was getting serious leg fatigue from driving, no matter what combinations I tried. My right leg, especially, was fighting to stay vertical to use the pedals.
Long story shorter... after seeing how others had done this mod in their cars (Prius seemed to be a popular one), I removed the two front bolts of the driver's seat, installed 3 thick washers, re-drilled holes into the legs in newly-required positions, (lower on the seat's legs) and re-installed new, longer bolts (M10 x 1.25mm pitch x 40mm long) of a superior rating/grade. I put an additional washer under the new bolt-head, et voila.
The result is that I now feel more secure in the seat, the electric thigh support finally is able to come up high enough to support the thighs, and I'm pushed further back into the seat (increased side-bolster support as a result) The entire seat now sits at more of an incline (if only a few degrees) and finally feels more like a bucket versus a bench.
This, for me, is a tiny mod with a tremendous result. I'm actually enjoying the Forester again